 BETA
BETA
Shoot your backgrounds to match your subject.
My Scene is your private background library — photos you've shot, ready to drop your subject into. Built right, one background can earn you dozens of finished images. Here's what makes a background actually work.
Your subject actually lands in the world
Most digital-backdrop services hand you a flat JPG and walk away. You spend the next hour faking the floor.
Drop a subject onto a backdrop the old way and the eye knows. Feet hovering. No shadow under the heel. No contact where a dress train meets the ground. Clients can't always name what's wrong — they just don't buy the print.
FUZE places your subject into the background and grounds her there. Real contact shadow. Real floor connection. A train that pools where a train should pool.
Then it matches the light. Your subject was photographed under studio strobes; the background was photographed somewhere else entirely. FUZE re-exposes and re-grades the subject to sit inside the scene's light — same color temperature, same exposure range, one grade across the whole frame, the way a single frame of film picks up the color of the room it was shot in.
Stack your looks on top. Tap a backlight. Add a gel. Bring in haze. Now the air around your subject agrees with the air around the world. That's the composite you've been building in Photoshop at midnight. Now it builds itself.

The background and the subject have to agree
Same angle. Same horizon. Same light direction. Same color temperature. Same exposure. That's the whole job.
FUZE locks your subject — pose, expression, identity, scale, position — and builds the world around her. If the background lies about where your subject is standing, or what the light is doing, the composite feels like two photographs stacked. If it tells the truth, your subject drops in like she belonged there.
Perspective and camera height — where the camera stood, and where the horizon lands.
Light direction — which side the key comes from, and where the shadows fall.
Color temperature — warm room, warm subject. Cool alley, cool subject.
Exposure — a dim scene wants a subject who can live in dim light.
Somewhere to stand — open floor where your subject's feet will go.
Seven things to get right in camera
Run through these the next time you're scouting or shooting. None of them are hard. All of them save you fighting it later.
Frame wide, keep it level
FUZE fits the scene to your subject's frame automatically, so you don't have to match ratios in camera. What you do need is room: shoot wider than you'll need on every side. Extra sides and headroom give the build something to work with. Keep your horizon level unless a tilt is the point.
Height and perspective
Shoot two or three heights when you can: low for hero poses, eye-level for natural portraits, slightly high for the rare case. Keep your lens consistent with how you photograph people — no extreme wide unless that's how you shoot subjects too.
Light direction and shadows
Identify the key light — sun, overcast, overhead, stadium, neon — and note which side it comes from. Read the shadow clues: pole, curb, doorway. Avoid mixed shadows running different directions. That's the tell that says "this background lied."
Color temperature and exposure
This is the one most people skip, and it's the one that separates a composite from a photograph. A warm tungsten room and a cool daylight subject will always read as two pictures. Note the color of the light and how bright the scene is, then pair it with a subject shot in similar conditions. Warm with warm. Bright with bright. Dim with dim.
Flat light is gold
Overcast days are your easiest composites. Soft, low-shadow light matches almost any subject lighting. Expose for smooth highlights — no blown sky if you want a believable scene.
Clear the landing zone
Leave open floor where your subject will stand. A table, a bench, a planter, a parked car sitting in that spot gives her nowhere to land. FUZE will move what it can, but an obvious clear space is always the stronger start. While you're at it: watch for people and cars, avoid readable signs and brand text, and check the clutter along your edges.
Depth and anchoring
Include foreground, mid, and background. Look for placement cues — ground texture, steps, sidewalk edges, court lines — anything that helps a subject feel anchored. Keep the scale of what's in frame believable, so your subject doesn't end up giant or tiny.
Two or three heights, two or three slight angle shifts, one wide safety frame, one empty-clean version with nobody in it. Wait them out. You'll thank yourself the next time a different subject needs the same location.
A few file rules
FUZE works hardest when you feed it a clean, sharp, full-resolution file. Thumbnails and screenshots fight back.
Don't forget the ground
A full-length subject needs somewhere to land. Walking pavement, grass, hardwood, gravel — whatever her feet will touch has to be in the frame and read clearly.
Tilt down. Get more ground than you think you need. Include the contact zone — the first few feet of floor in front of where she'll stand — and let it run off the bottom of the frame. That's what FUZE grounds to. Crop it tight to the horizon and the composite will hover.
If you'd shoot her in heels, don't pair the photo with a gravel pit. If they're in cleats, don't put them on parquet. Match the world to what she's wearing.
Let the scene serve the subject
Two things decide whether a subject drops in or sits on top: the camera, and the scale.
Perspective first. Every background carries a built-in horizon and a sense of where the camera stood. Shoot your subject from a matching height and let the horizon land in the same place. You don't have to do the math — just match the line.
Then watch the scale cues. Some scenes announce their own size, and a subject dropped into them has to obey.
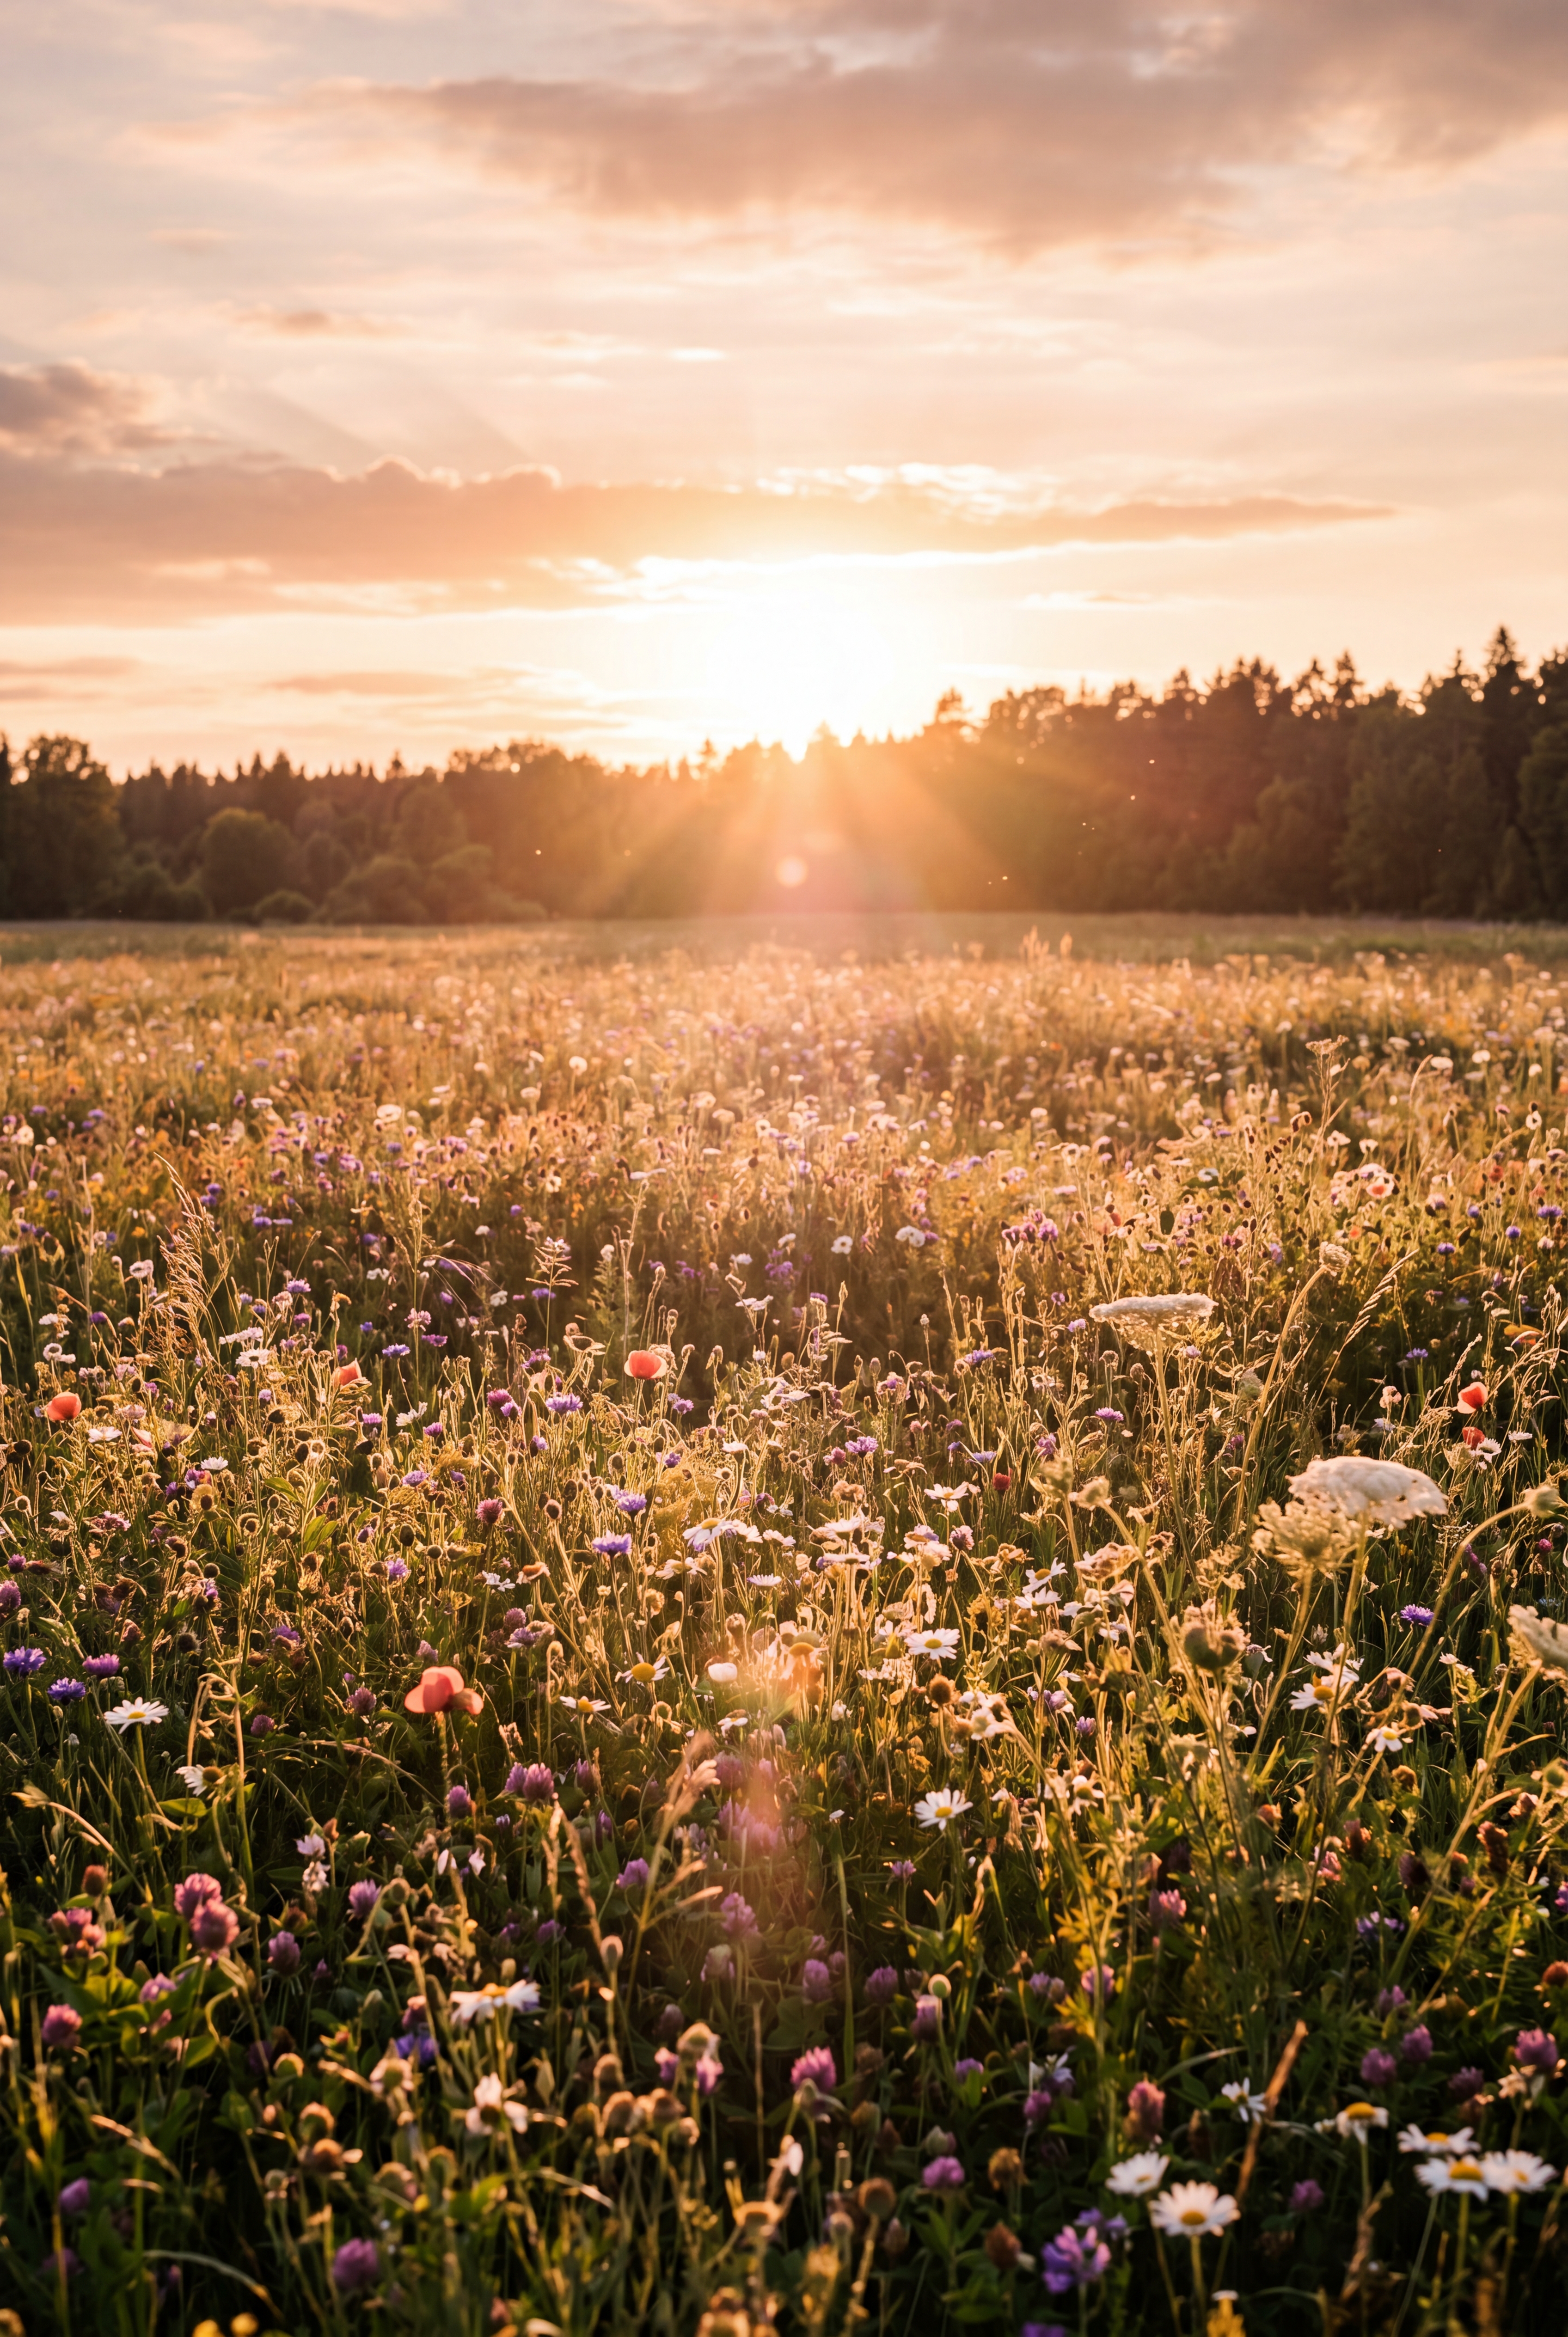
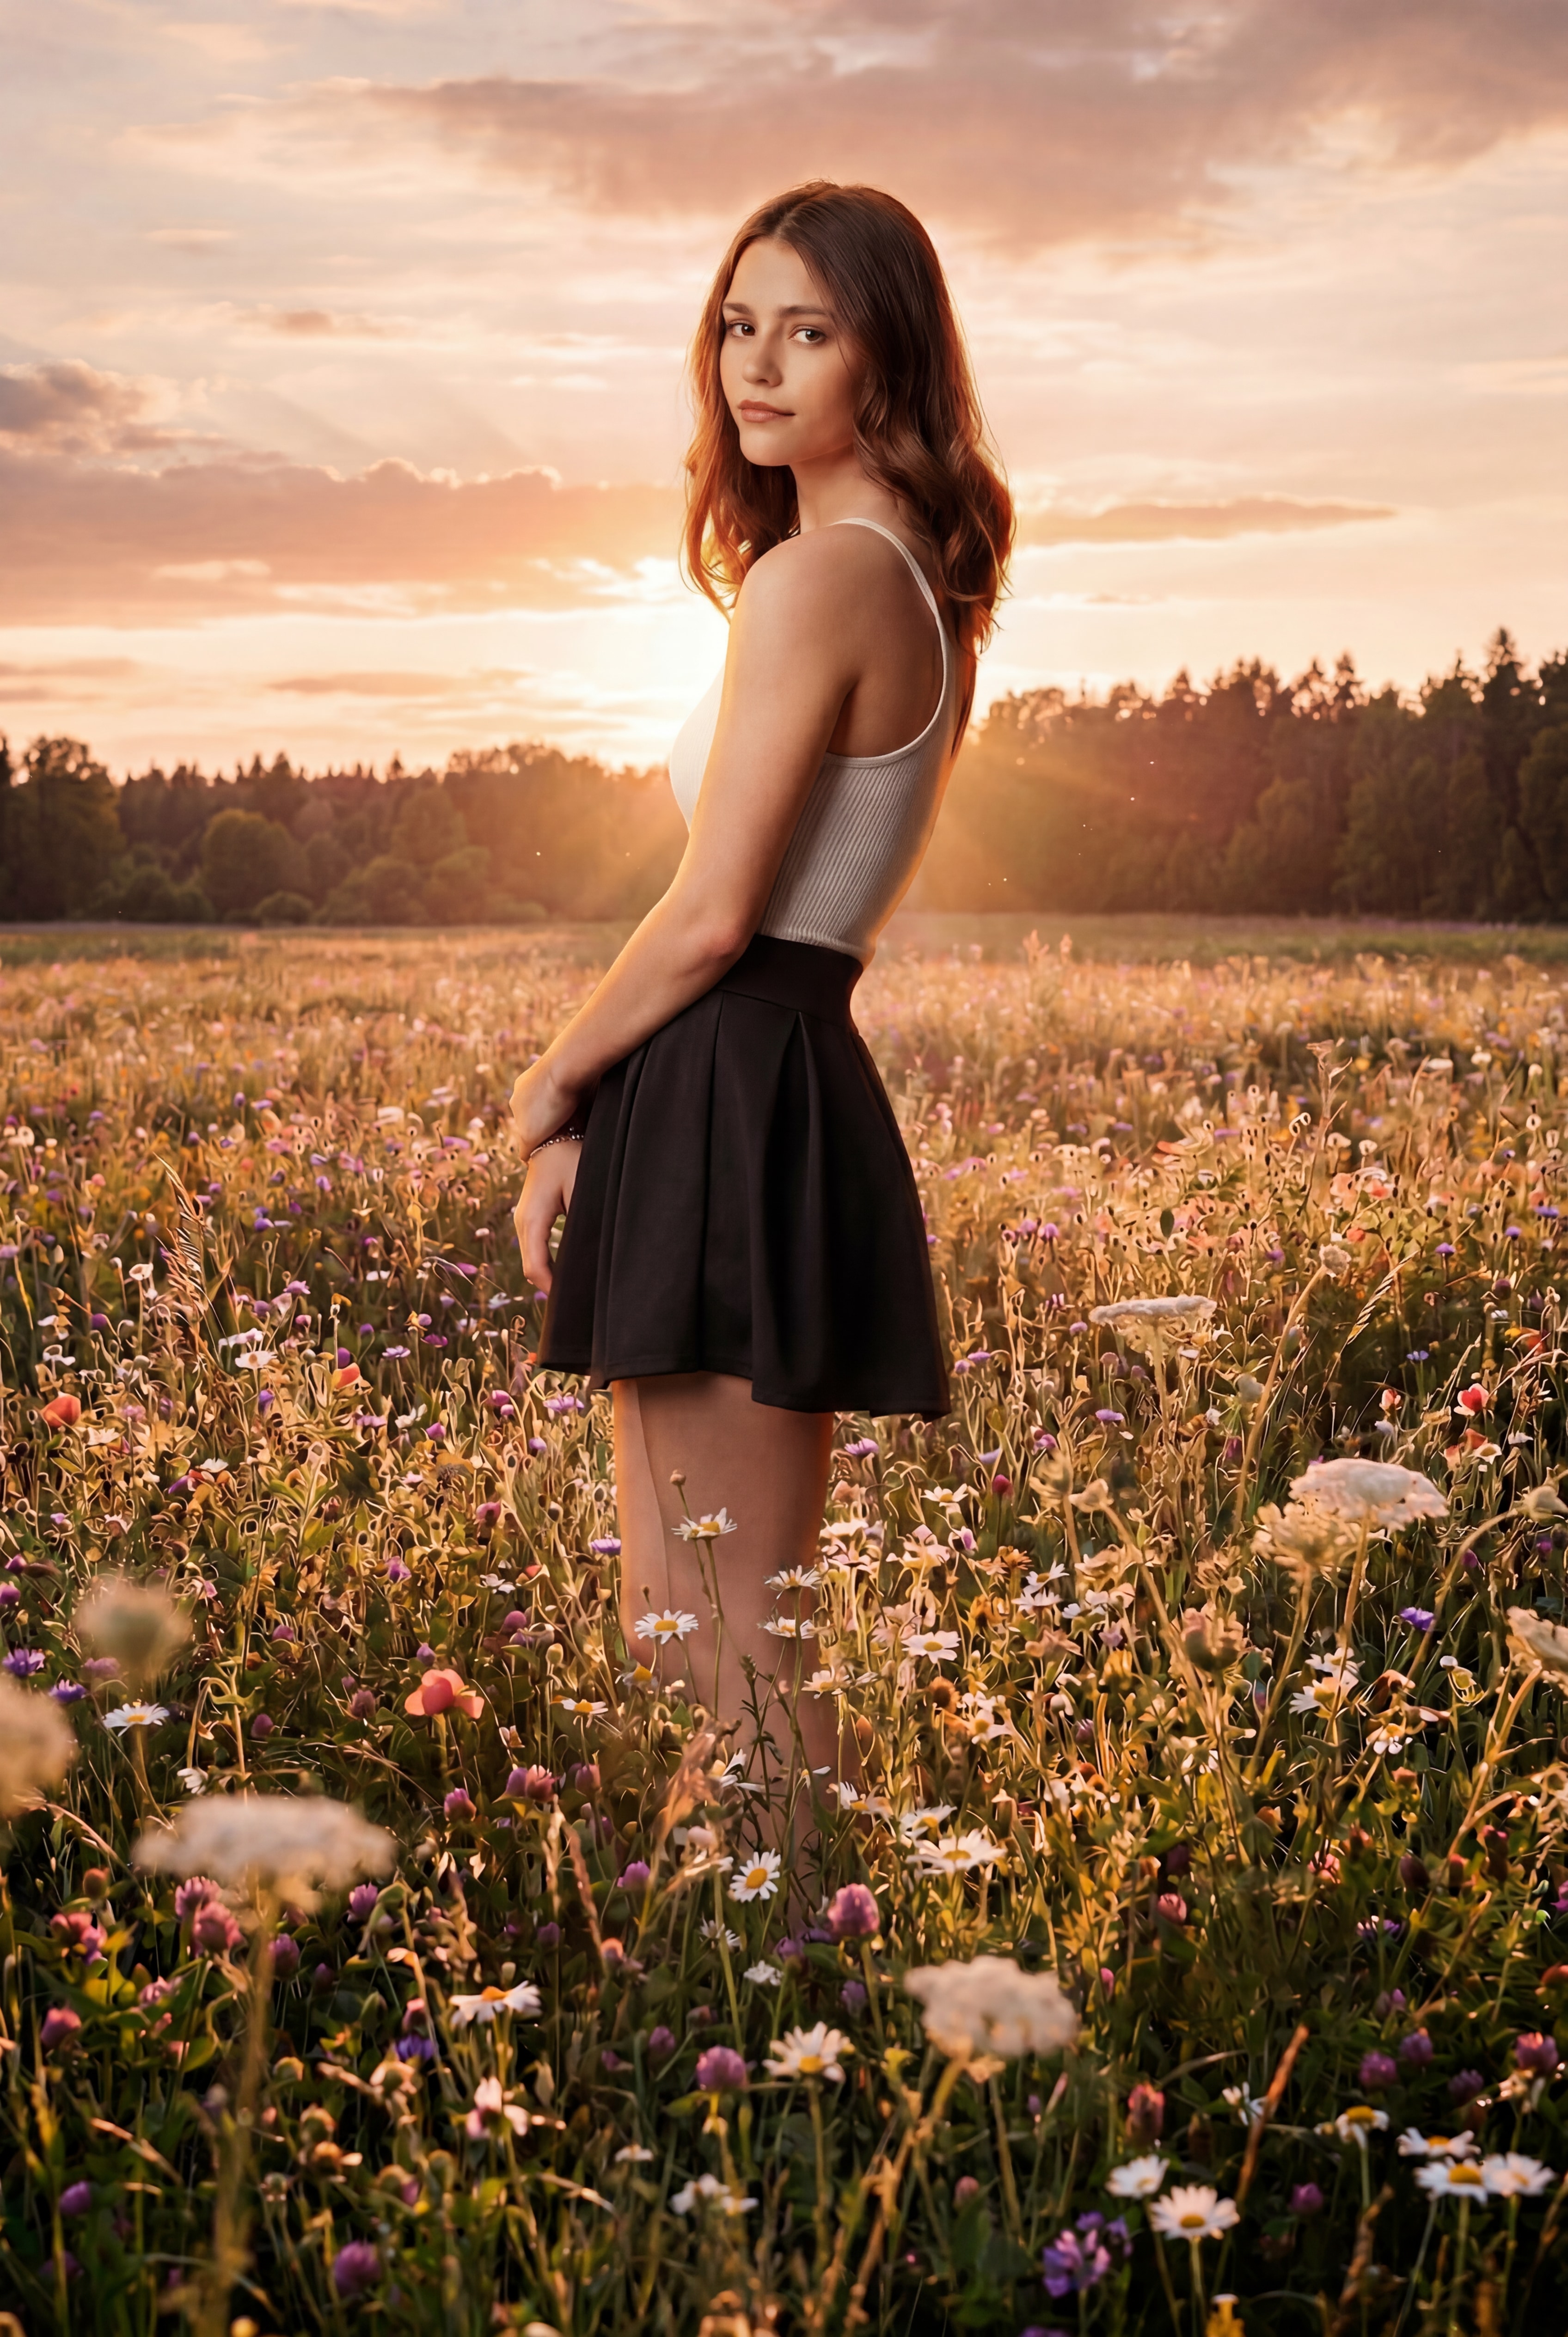
Natural-height wildflowers, open sky, nothing locking a scale. She stays the size you shot her — grounded, full-length, reading as one photograph.
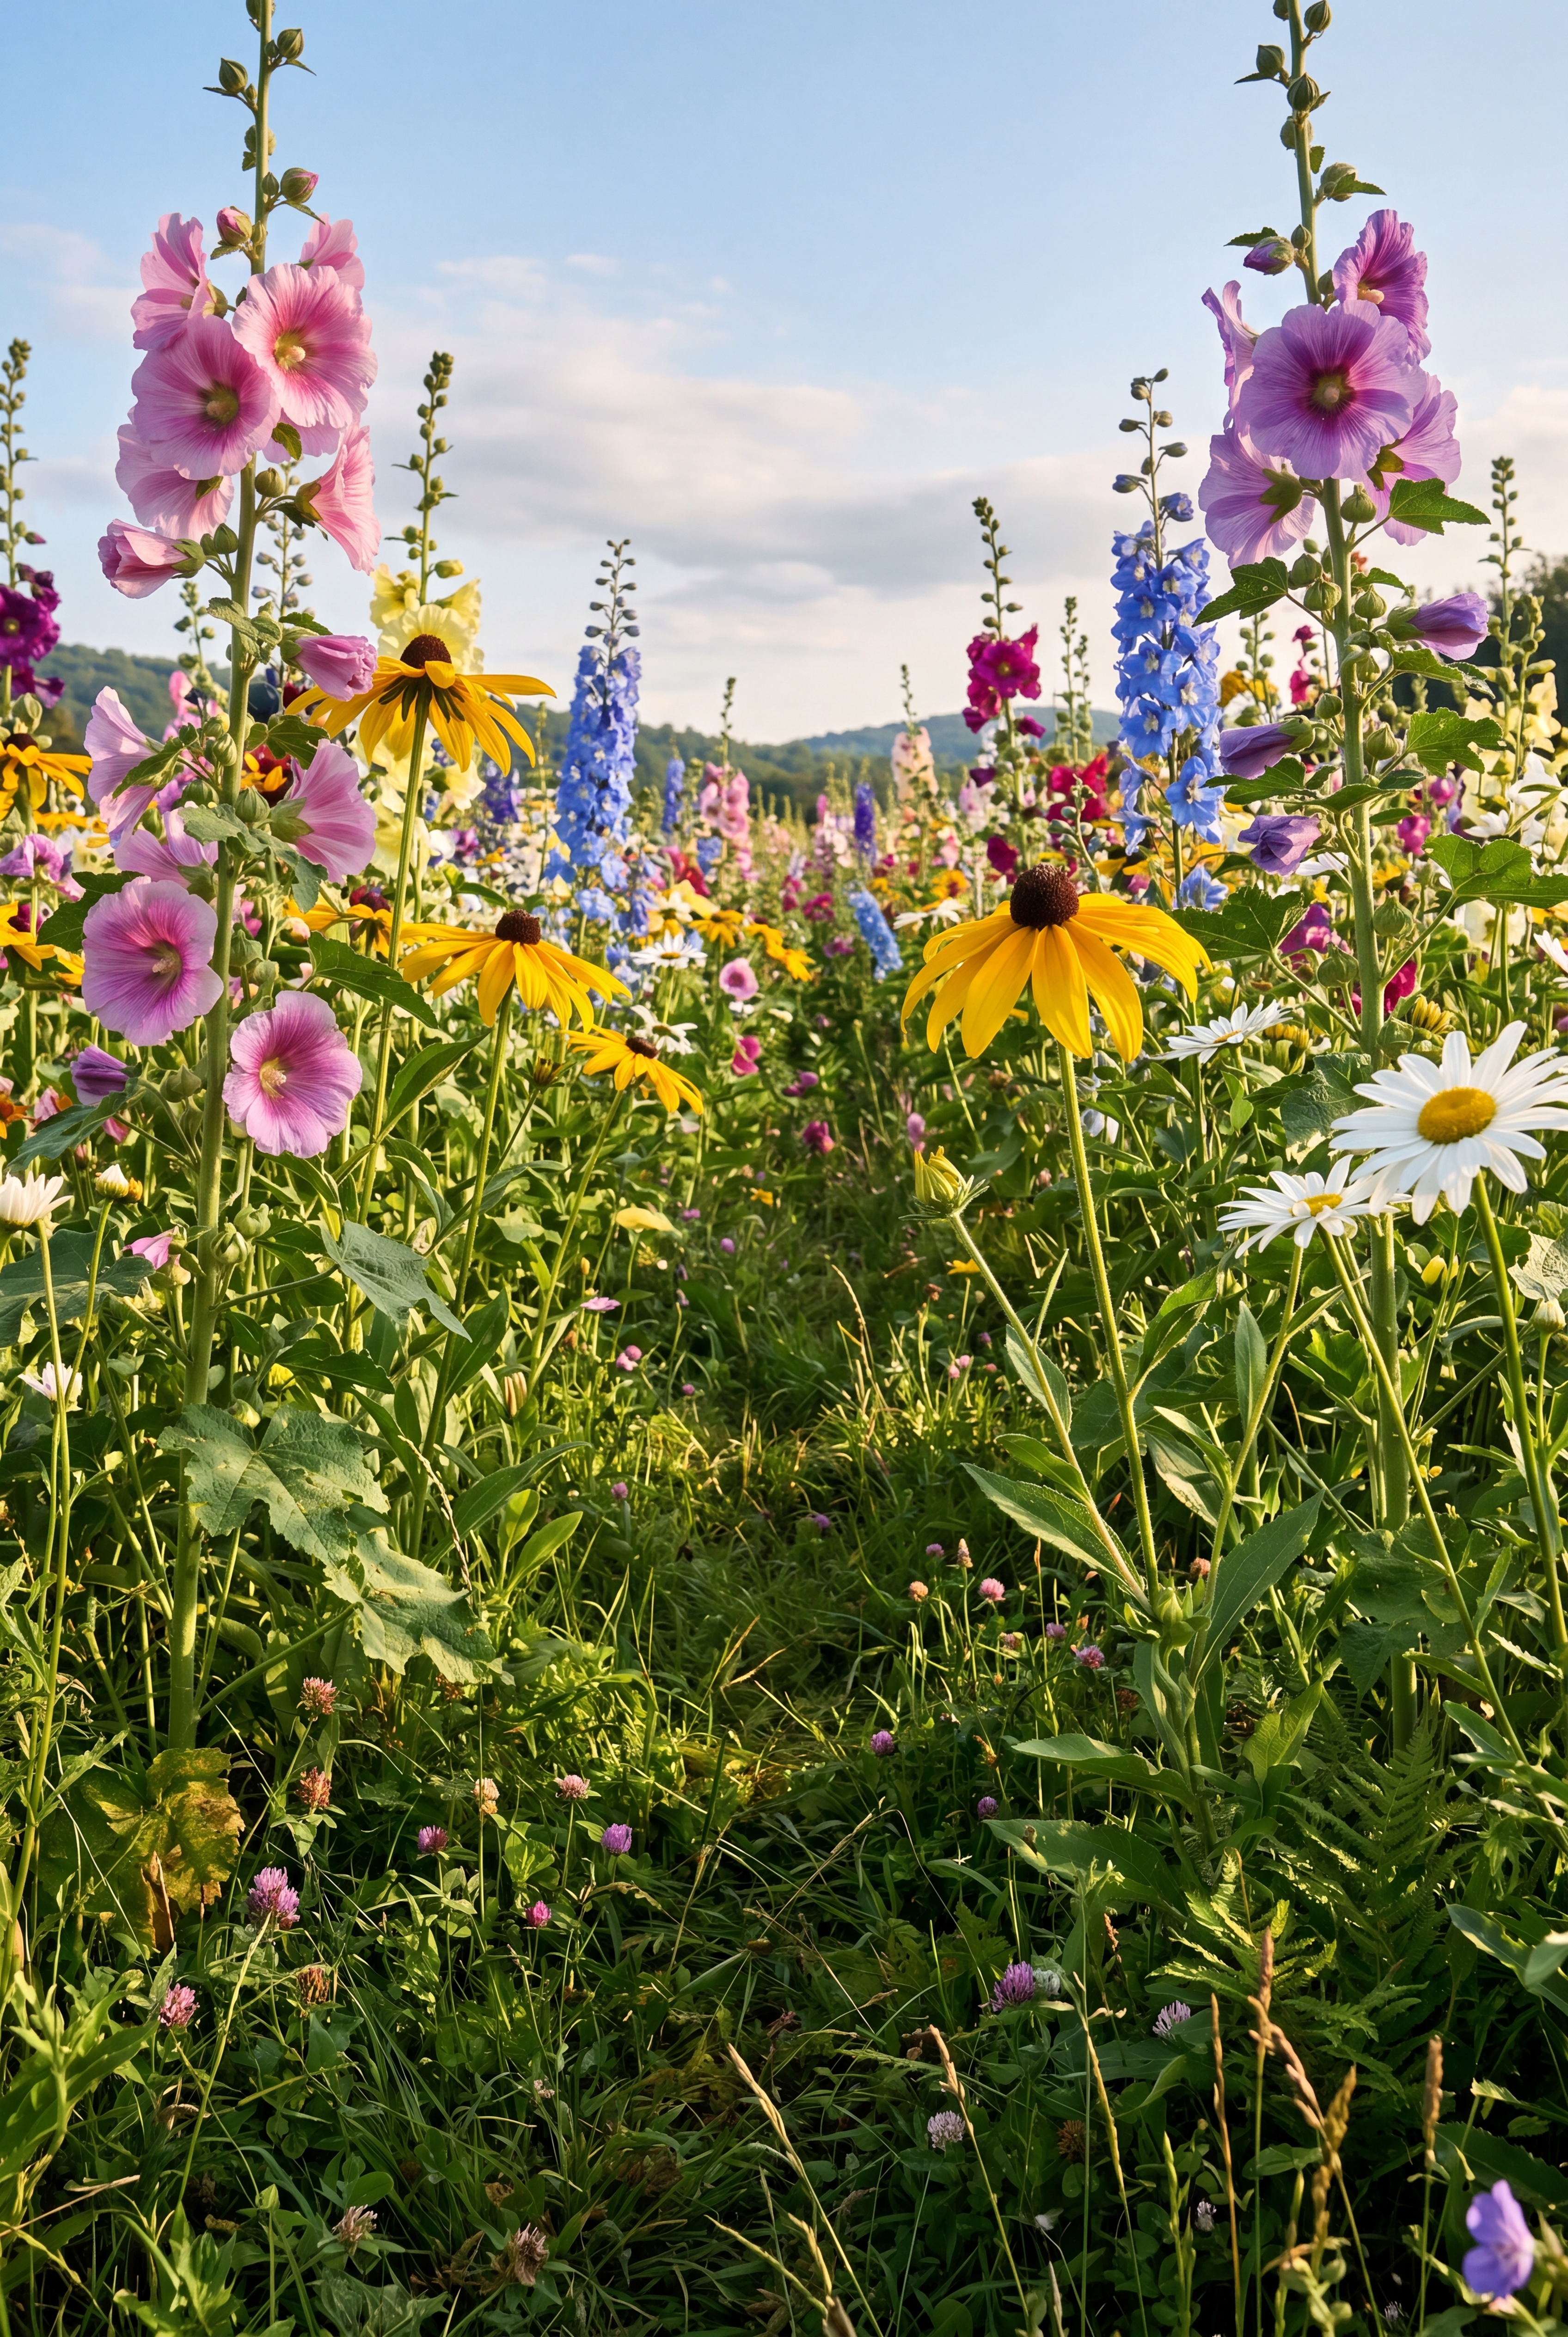
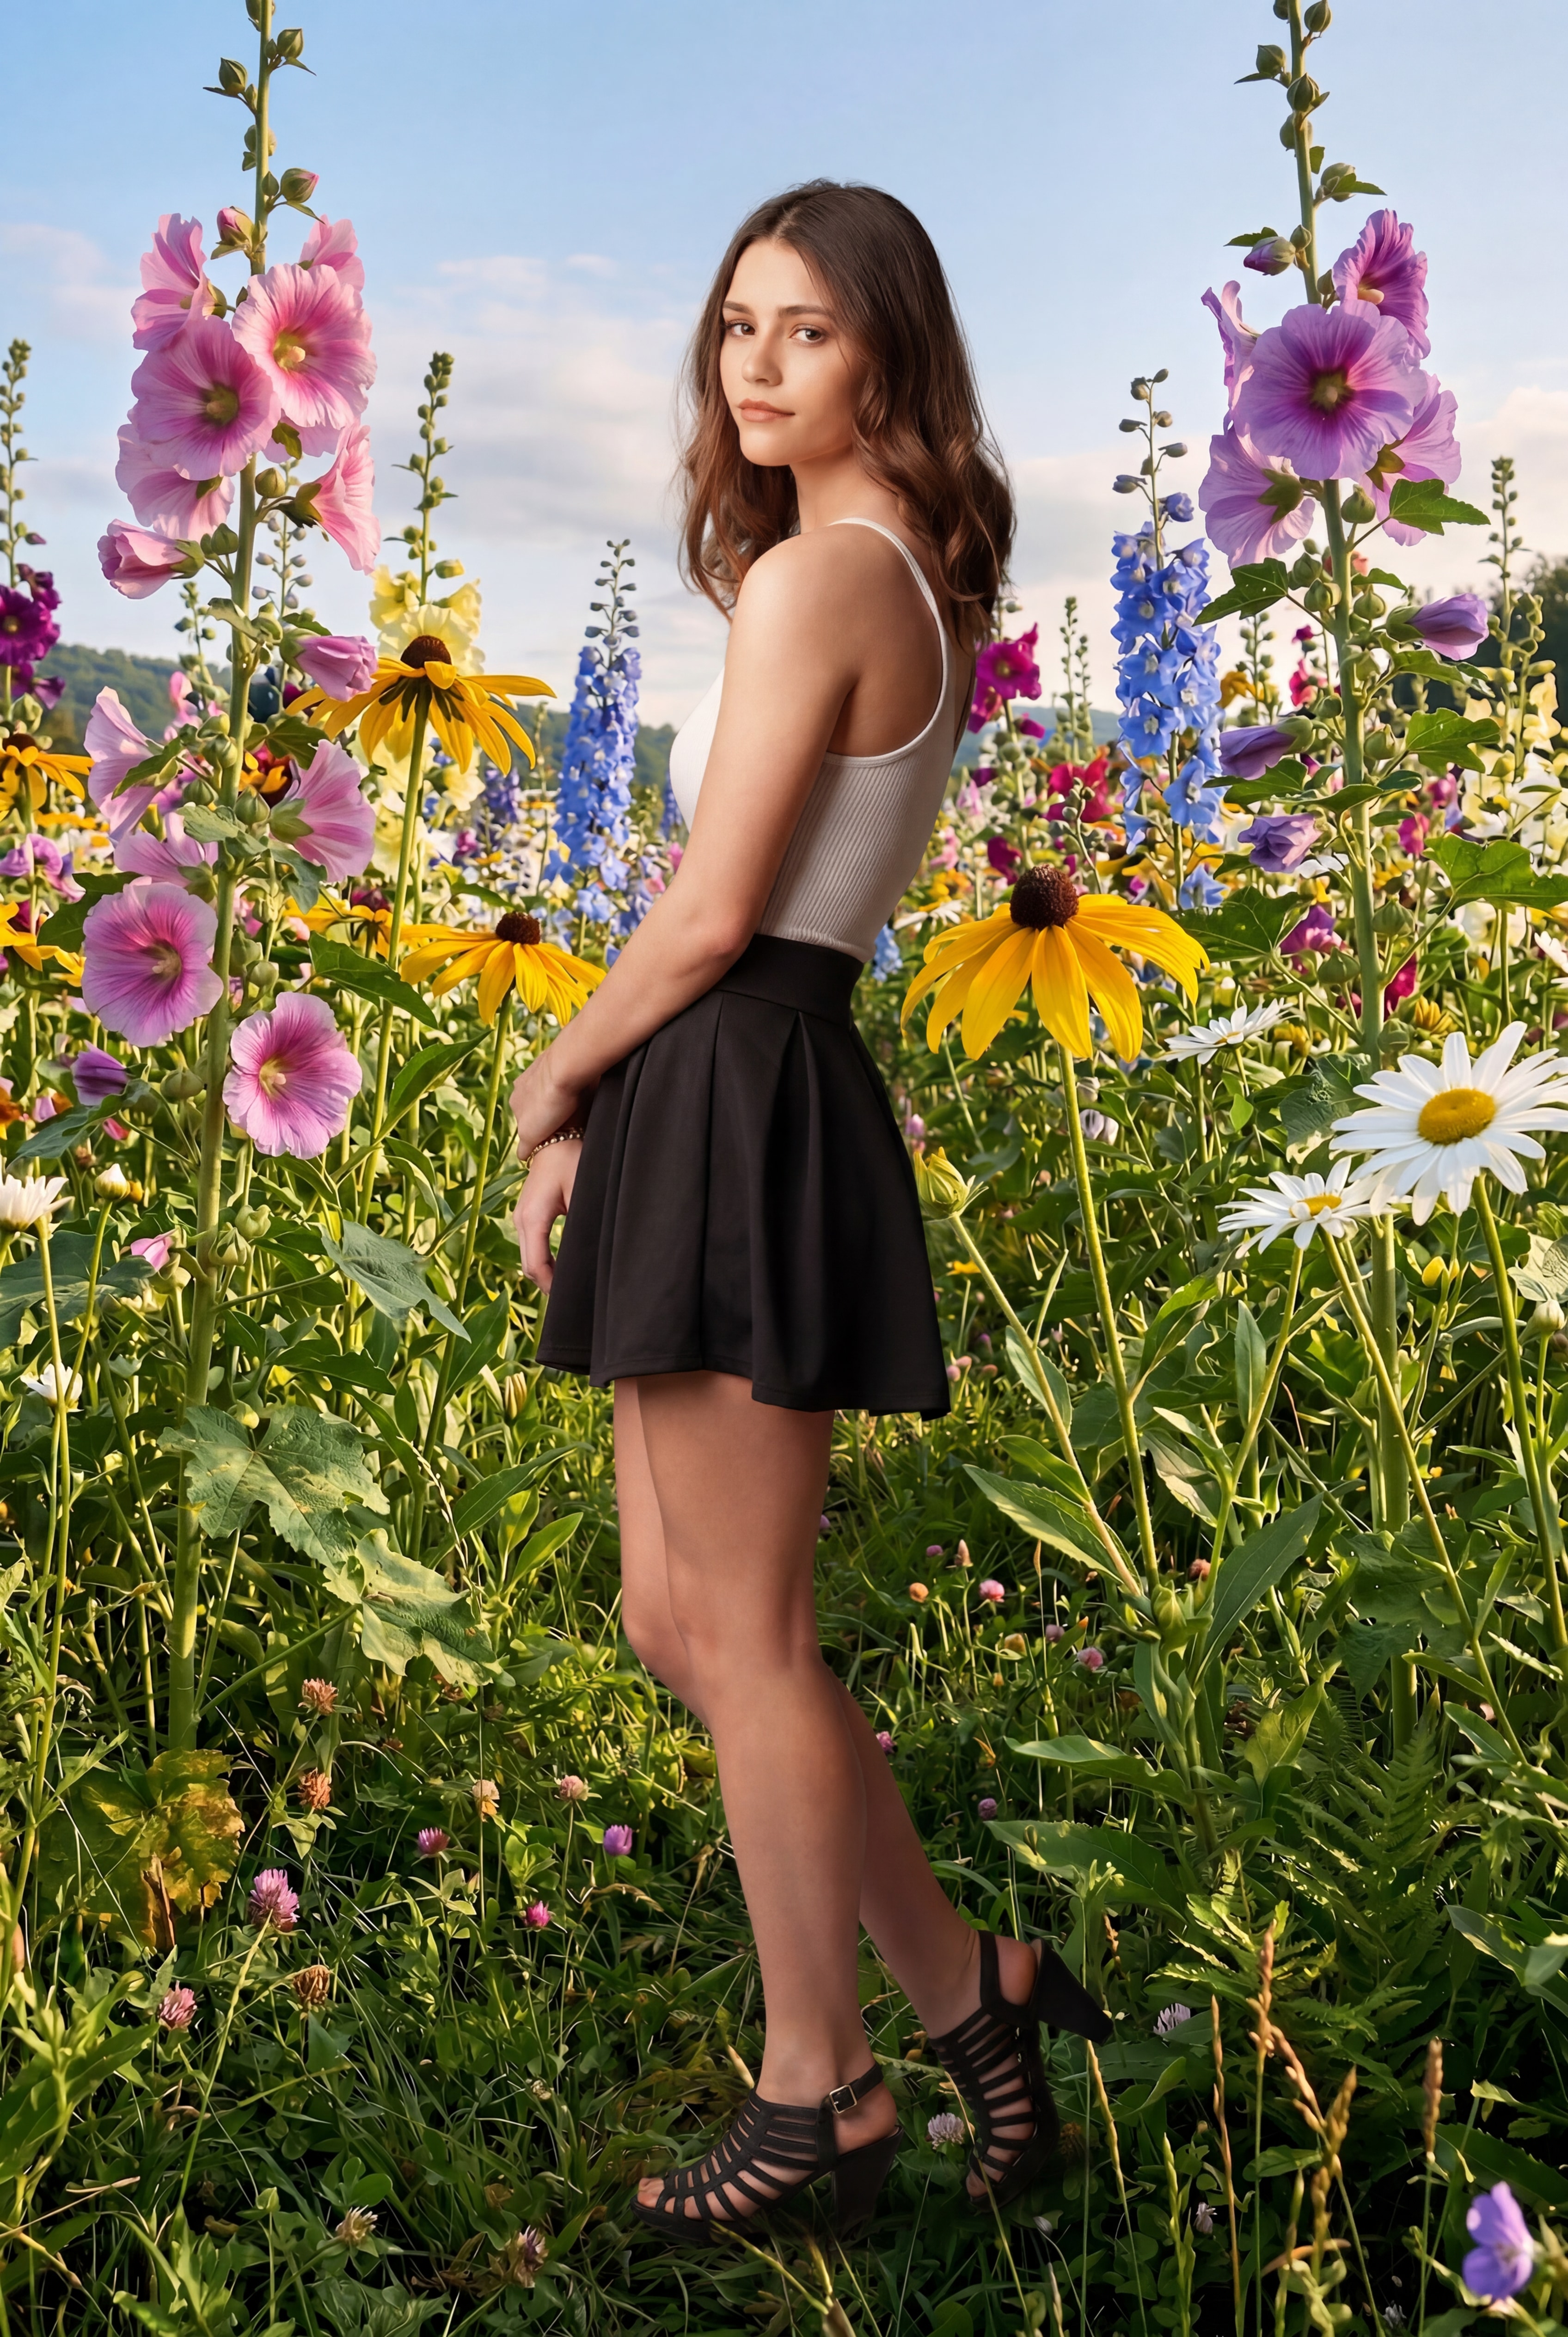
The empty plate looks gorgeous and harmless. Then she drops in and the blossoms tower over her. Storybook, not real. When the scene announces its own size, the build has to reconcile it. Unless that surreal look is the point, this is a scene to swap, not salvage.
A corridor of columns, a long hallway, an aisle receding to a vanishing point — these are the most demanding backgrounds you can hand any compositing tool, yours or anyone's. The scene's geometry is so insistent that everything in the frame has to answer to it. FUZE holds your subject's size and placement regardless, but the easiest wins come from scenes with a gentler sense of depth.
Not rules to memorize — just the usual suspects
Readable signage and brand text
Storefronts, logos, billboards, license plates, jersey numbers. Hard to render convincingly and they date the image. Reframe or wait it out.
Light that fights itself
Wild crossing shadows, patchy sun through clouds, blown-out sky. If the light is arguing in the background, the composite will argue too.
Soft or motion-blurred frames
Sharp gives you options — you can always add depth later. Soft is locked in.
A scene that's already full
Furniture, fixtures, or clutter parked exactly where your subject needs to stand. Shoot the same view with the spot clear.
The work you did at the shoot is what FUZE has to work with
Then you finish it. Tap a light. Add atmosphere. Take it to 8K, or pull the layered file into Photoshop and make it yours.
Build a library that belongs to your work. Your town. Your light. The places your clients actually go. The reason this approach works is the same reason it always worked — believability.
A few things about using your own images
Plain version of the legal language. The full Terms and Privacy Policy still apply.
Shoot it sharp. Shoot it level.
Mind the ground. Own the file.